How to use a remote mail server?
To use the mail server of an external service such as G Suite/Google Workspace you must follow these steps:
- In the control panel, go to Zone Editor, inside the Domains box.
.webp)
- Then, press the Manage button on the domain you want to modify.
.webp)
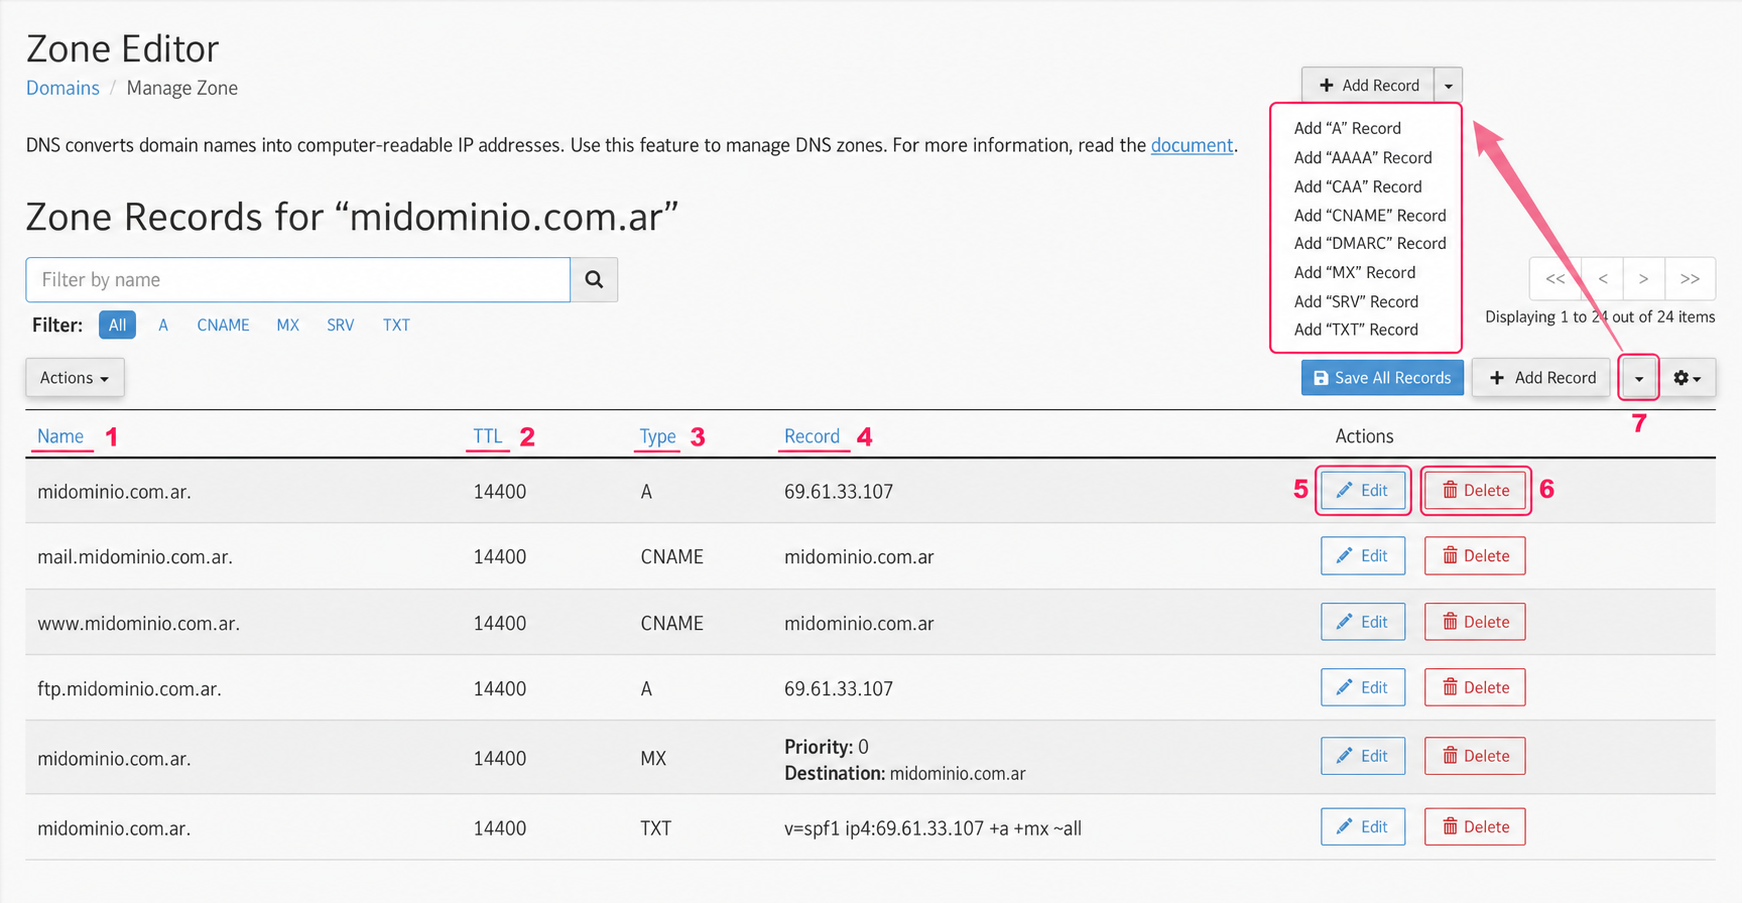
- You will enter the DNS Zone editor. On this screen you will see many data points you should know:
- In the Name column you will see your domain and all subdomains created in your account. Each domain or subdomain, depending on its Record, will point to one server or another.
- The TTL column will show you the time (in seconds) that it will take for the record change to be processed.
- The Type column is very important. It defines the Type of Record assigned to the domain. Each Record (A, CNAME, MX, etc.) allows a specific type of data (IP, domain, string of characters, etc.).
- The Record column defines where the domain or subdomain will point, using the defined record type. This is where you must configure the destination server.
- The Edit button will allow you to edit the record. When modifying it will become the Save the record button.
- The Delete button will remove the record from the DNS Zone.
- At the top right you will see a dropdown menu. This menu will allow you to add a new Record to the DNS Zone.
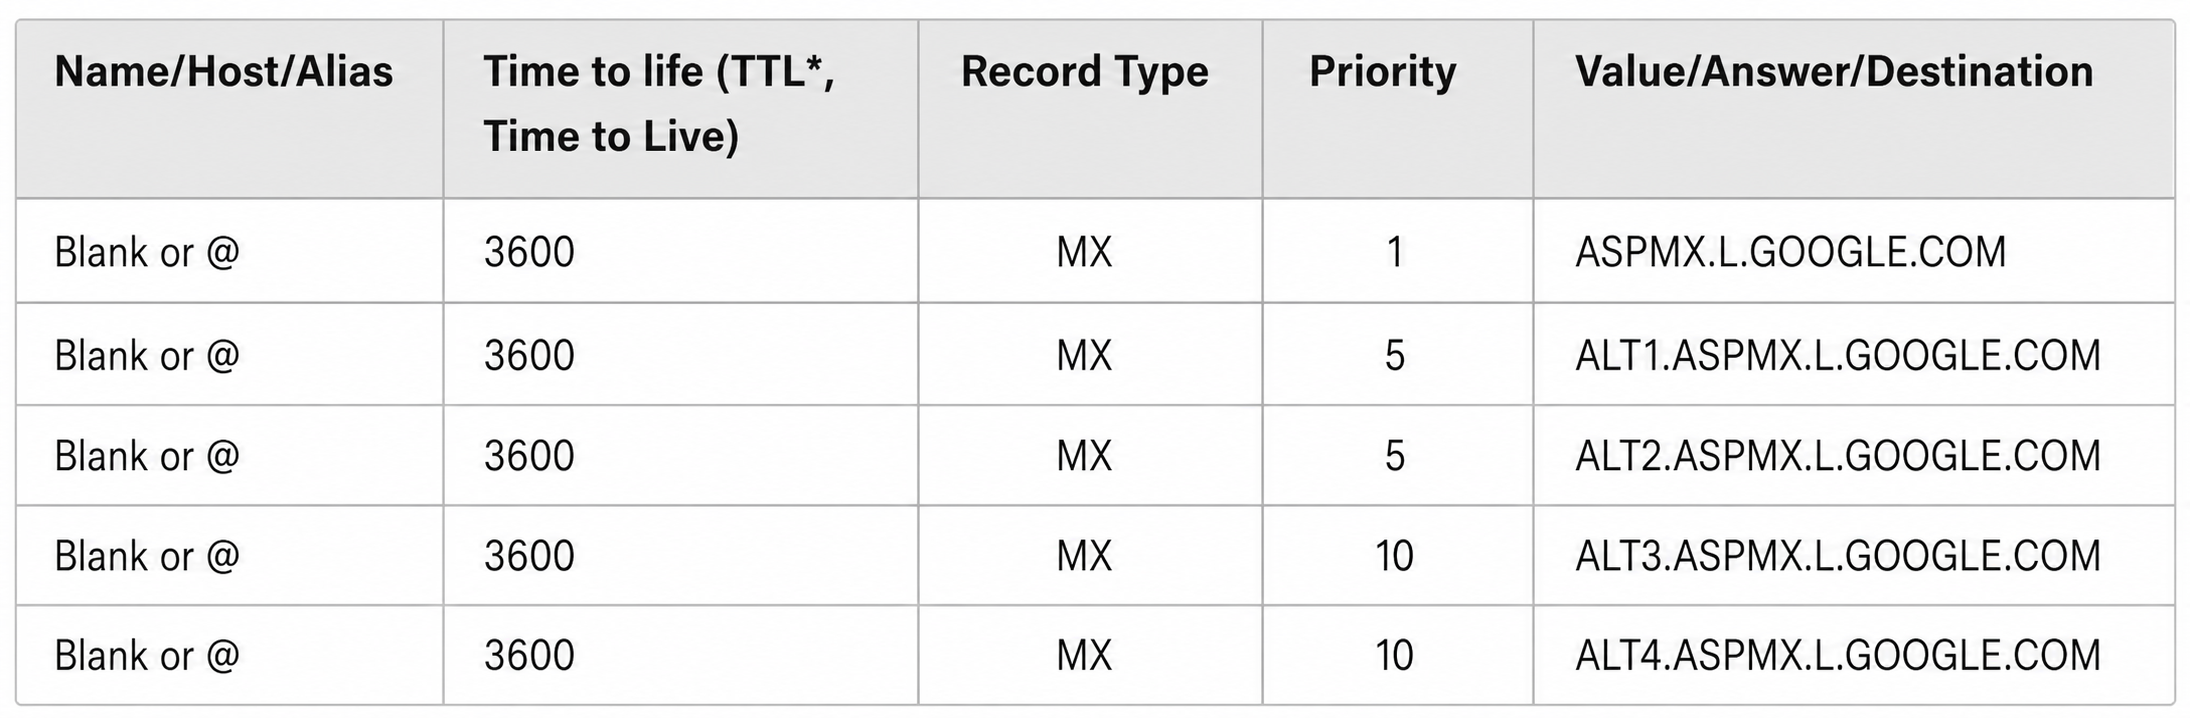
- First, you will need to obtain the MX records from the external service you want to use. For example, Google shows its records on this web page: https://support.google.com/a/answer/174125?hl=es.
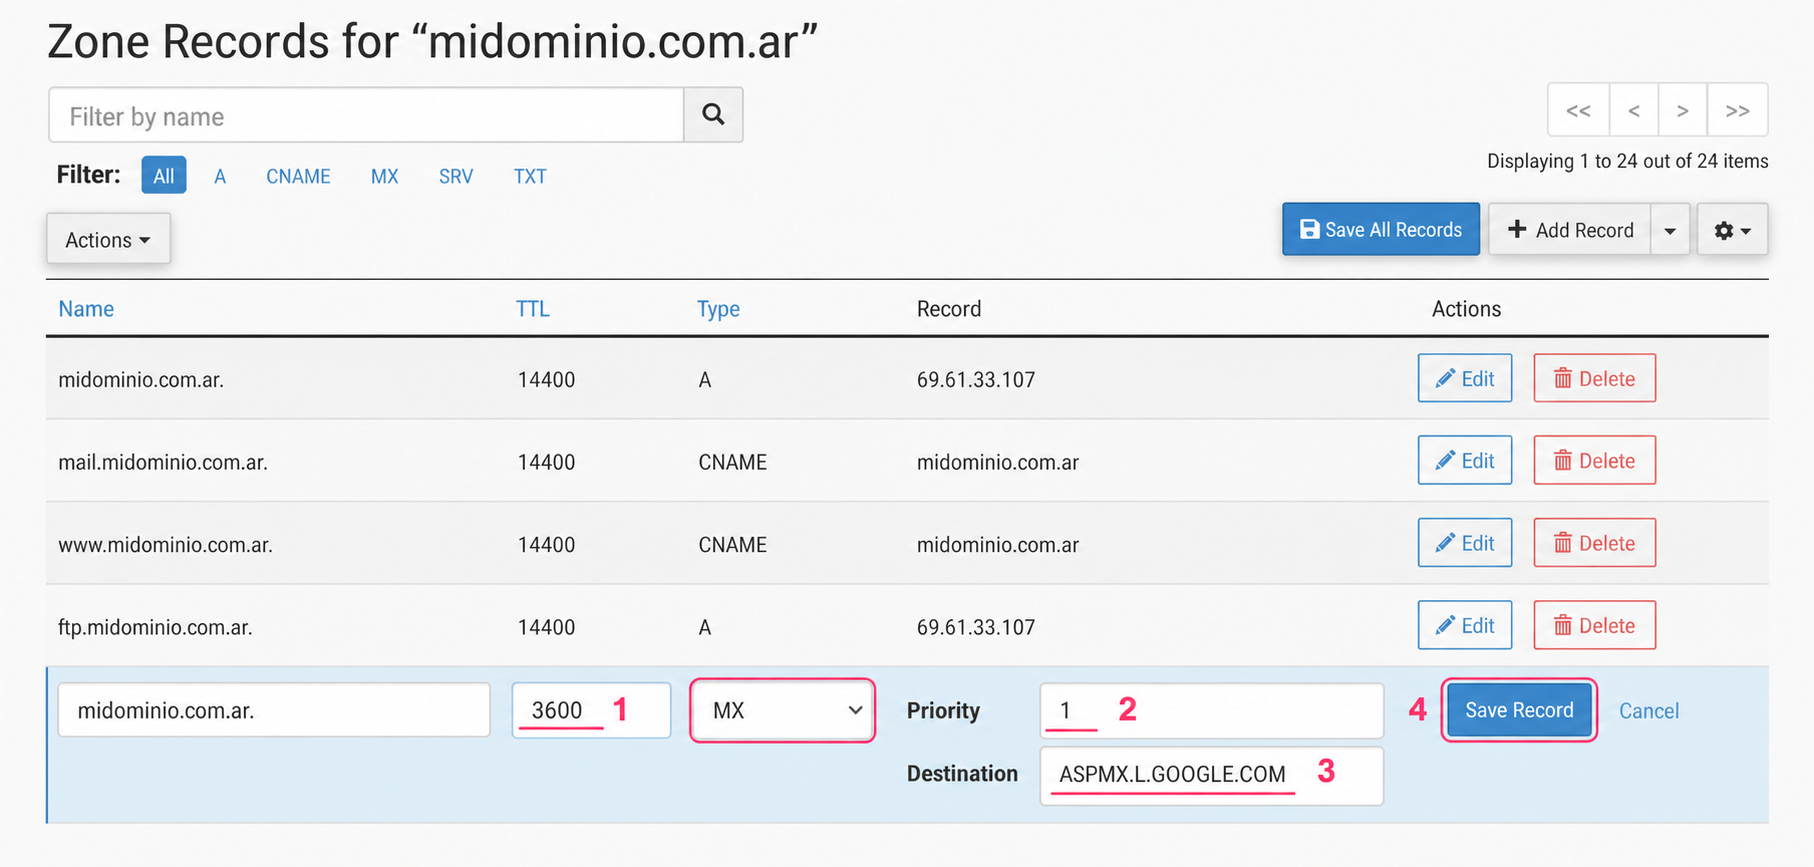
In your DNS Zone editor you will need to modify the existing MX record as shown in the image, taking into account the data from the service you want to use.
- Using G Suite/Google Workspace as an example, you will need to modify the TTL value.
- Then you must set the Priority field.
- Then the Destination. You will obtain all these data from the service you want to use.
- Finally save the changes with the Save the Record button.
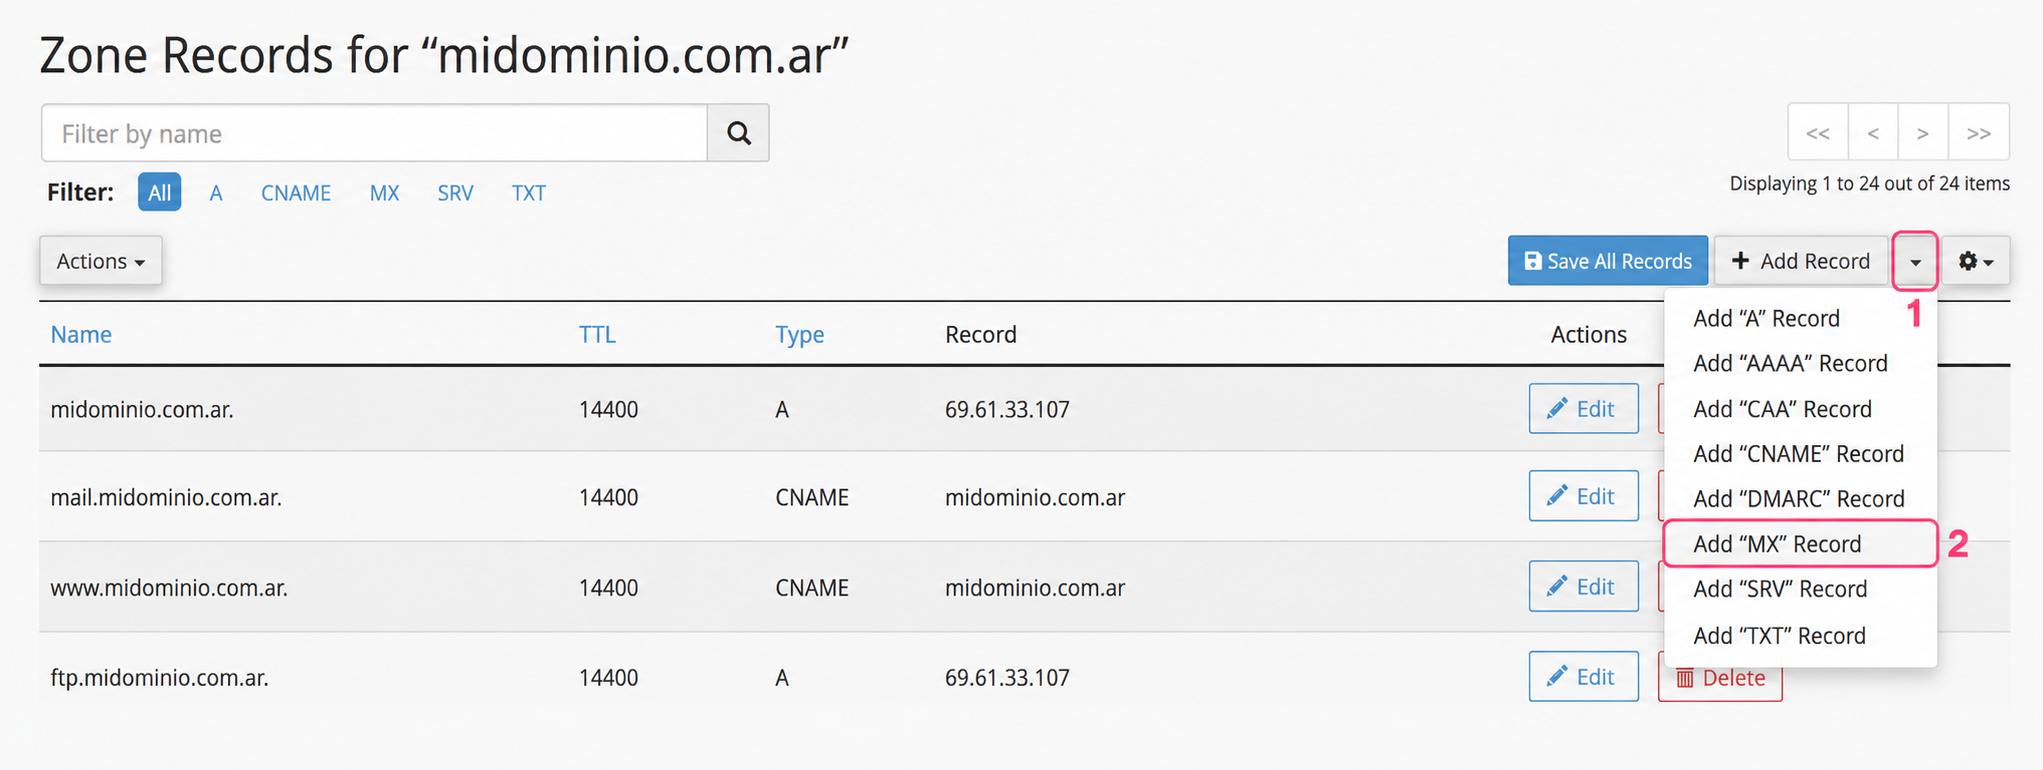
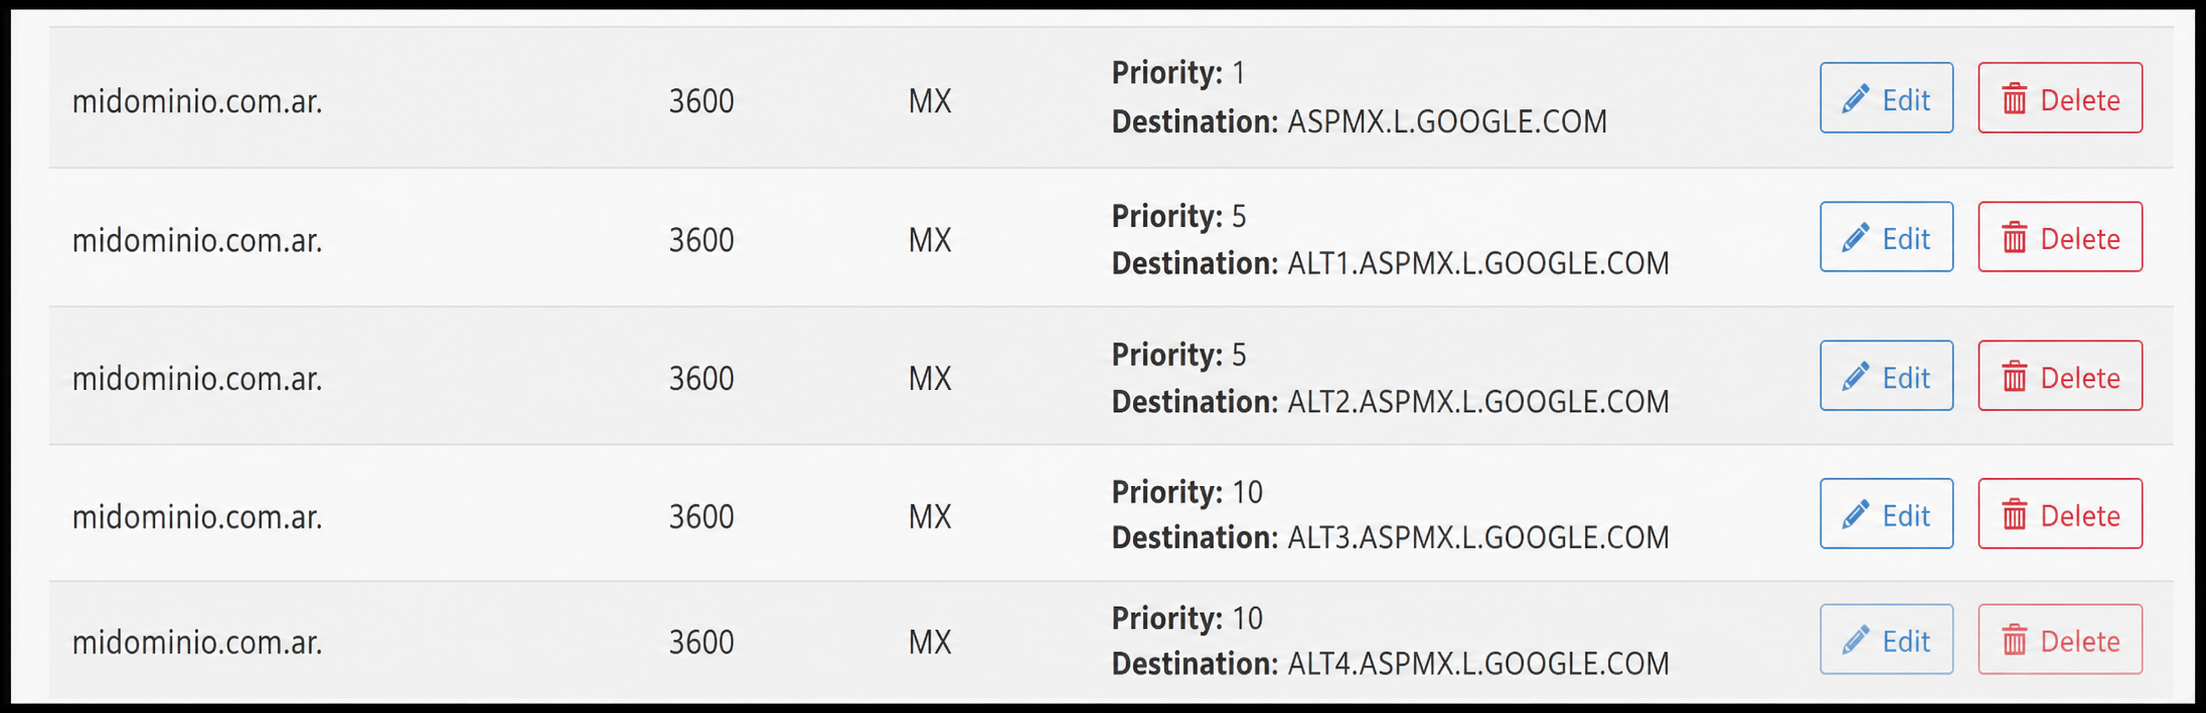
It may happen that you need to add a new record to your DNS Zone; in our example, Google asks you to add four more MX records to your Zone. So:
- Expand the menu at the top right. This menu will allow you to create any record.
- Choose Add “MX” record. Repeat this step four times to create the four MX records that Google asks for.
Now, you will have to configure these MX records as you did with the first one, using the data shown by Google on its page.
- You will need to change the TTL to 3600.
- Then the Priority. You will see that there are two records with priority 5 and two with priority 10.
- Then the Destination. This is the most important data of all.
- Finally, you can save all the changes at once with the Save All Records button.
That is all. You should have, in the case of configuring G Suite/Google Workspace, these five MX records created.
Now, your mail server, instead of using our server, will use the one from G Suite/Google Workspace.